How to Install the ConnectWise ScreenConnect client on a Mac
Below, we explain how to install the ConnectWise ScreenConnect client on a Mac.
What is Connectwise ScreenConnect?
ConnectWise ScreenConnect is a powerful remote access tool designed for efficient remote support for Mac computers. It allows our Technicians to troubleshoot and resolve issues remotely, saving time and costs while minimizing downtime for users. Key features include secure, low-latency screen sharing, file transfer, chat, real-time annotation, and multi-OS compatibility. With robust security measures like encrypted connections, session recording and two-factor authentication, it’s ideal for industries requiring high data protection. ScreenConnect ensures a seamless, professional support experience for both technicians and Mac users. Keep reading to learn how to install the ConnectWise ScreenConnect client on a Mac.
How to Install the ConnectWise ScreenConnect client on a Mac (macOS Sequoia)
1. Type www.rtu.support into the address bar of your browser. You will see a page similar to the one below:
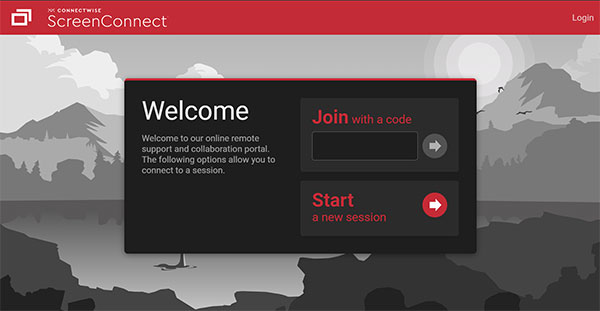
2. Your Technician will provide a five digit code for you to enter. Click the arrow to the right to begin the download. The download will be named: ScreenConnect.ClientSetup.pkg.
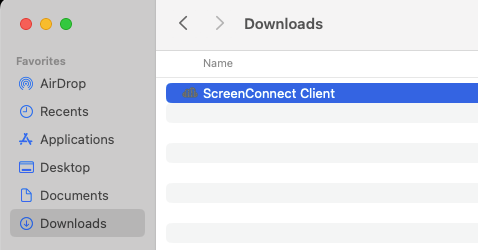
3. Open the .pkg file
Open Finder > Downloads to locate the package. Click to open the ScreenConnect Client.
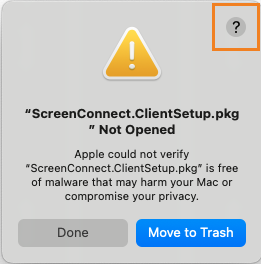
4. Click the Help icon in the warning prompt
This will open the related Help file.
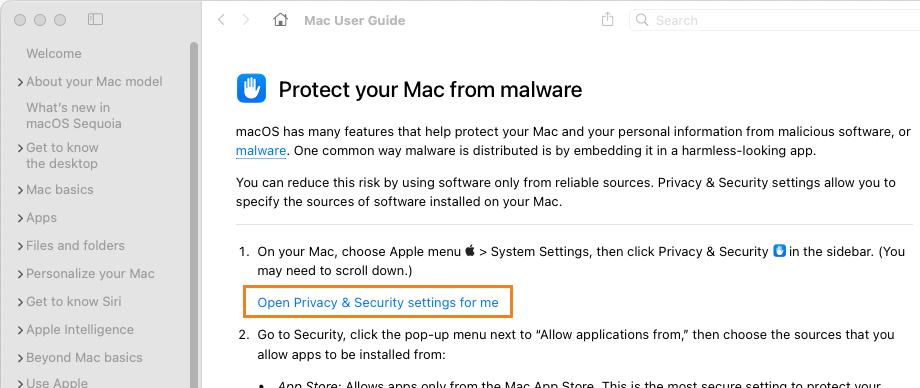
5. Click Open Privacy & Security settings for me
6. Open Anyway
In the Privacy & Security setting, scroll all the way down to the Security section. Click Open Anyway next to, “ScreenConnect.ClientSetup.pkg” was blocked to protect your Mac.
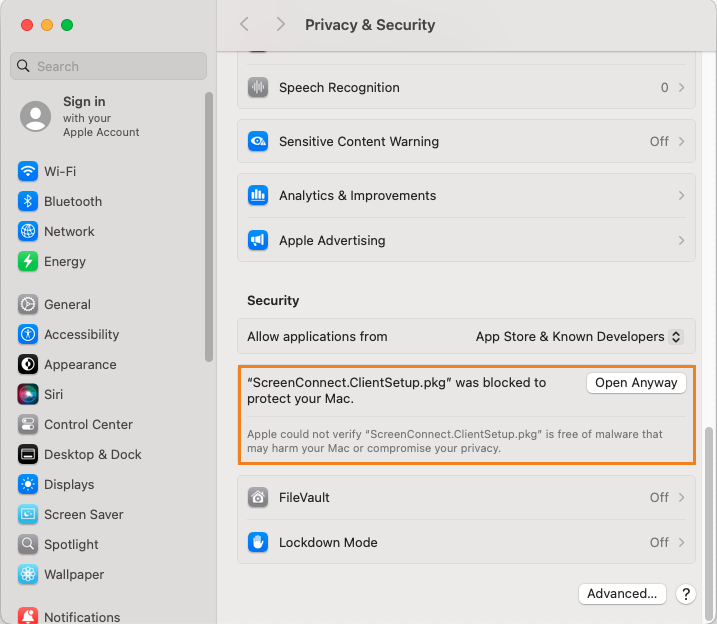
7. Open ScreenConnect.ClientSetup.pkg
Next, another warning pops up. Click Open Anyway.
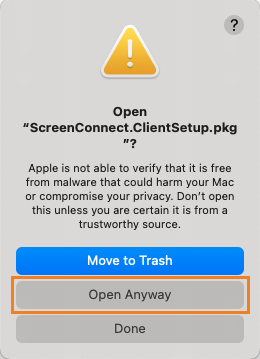
8. Enter administrator credentials
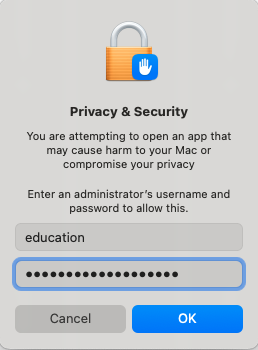
9. Close the installation wizard.
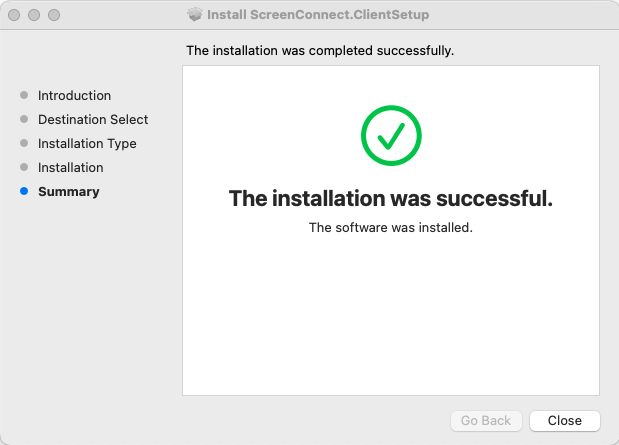
10. Allow screen recording permissions
Click Allow when prompted to allow screen recording permissions.
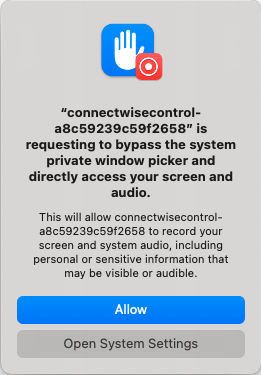
11. Local network permission (optional)
You might see another popup seeking permission to “find devices on local networks”. Allowed or not, this shouldn’t affect the functioning of the ScreenConnect agent.
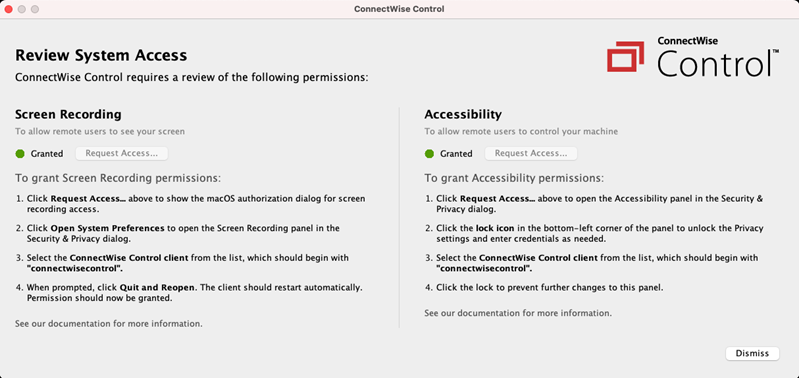
12. Complete setup by connecting to the machine (Review System Access)
*The Technician might be connected to your Mac at this point but he won’t be able to see your screen or provide remote support until certain permissions are granted.

13. Allow access to Screen Recording
In the Screen Recording section, click on Request Access…
(You might need to click the padlock icon in older macOS versions.)
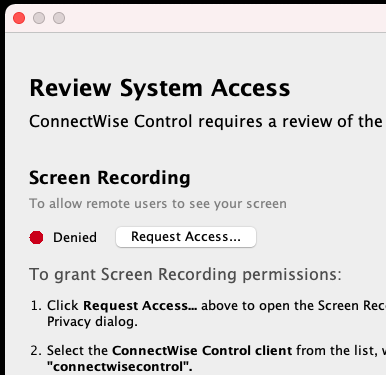
14. Click the toggle switch on for the “connectwisecontrol…” client.
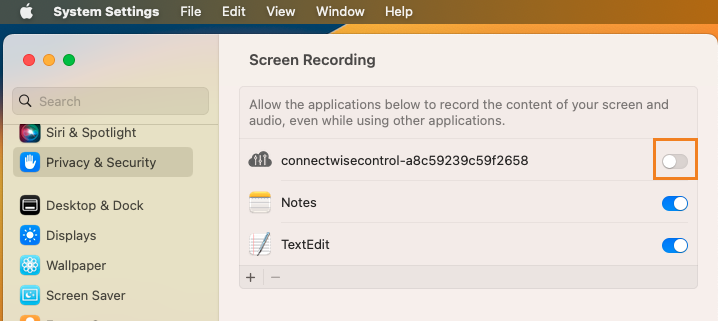
15. Enter administrator credentials if necessary
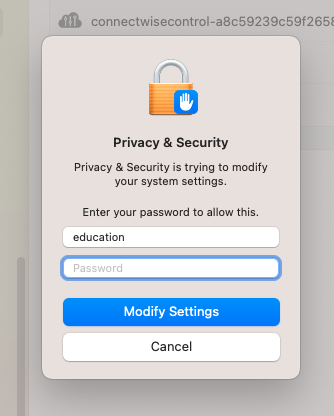
16. Click Quite & Reopen to restart the client.
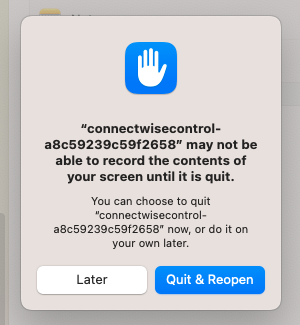
17. When the client opens again, confirm that Screen Recording is now showing “Granted“.
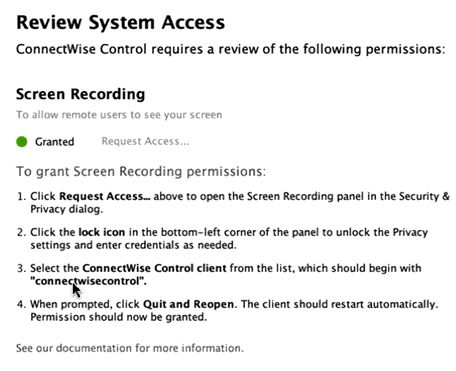
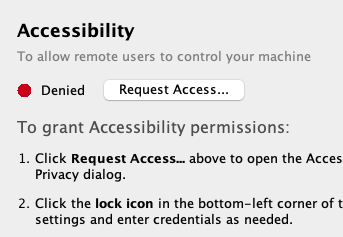
18. Allow access to Accessibility
Click “Request Access…” in the Accessibility section
(You might need to click the padlock icon in older macOS versions.)
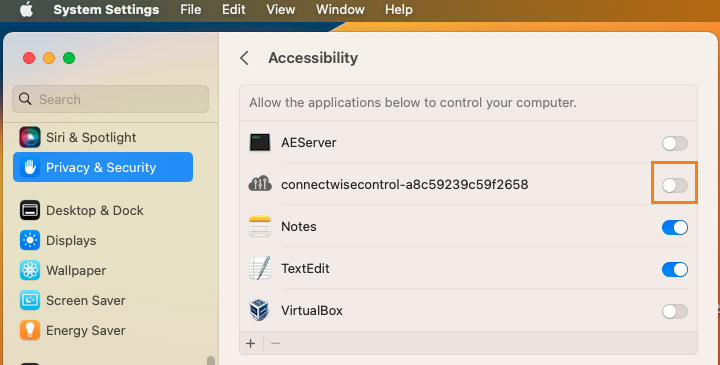
19. Click the toggle switch on for the “connectwisecontrol…” client.
20. MacOS Big Sur
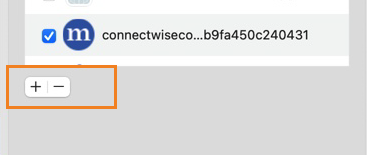
If you don’t see the “connectwisecontrol” client, add it by clicking the plus (+) icon at the bottom of the program list. Navigate to /opt/connectwisecontrol-xxxxxxx and select the client there.
Note: the directory/opt/ is a hidden folder. To access it:
- Click the (+) icon to open Finder.
- Press Command+Shift+G.
- In the text field, enter
/usr/local/opt - Open the /opt/ directory and you should see the “connectwisecontrol” client. Click on it to add it to the program list, and click on the checkbox to enable it.
21. Confirm “Granted” status for both Screen Recording and Accessibility.
Your Technician should now be able to view your screen, control your Mac and provide remote support services.
Troubleshooting: Confirm that the ScreenConnect agent is running
Open Activity Monitor and see if ScreenConnect appears in the list of processes as ConnectWise Control Client.
If you don’t see the “connectwisecontrol” client, add it by clicking the plus (+) icon at the bottom of the program list.
Navigate to Applications and select the connectwisecontrol-xxxxxxx client there.
Note: Prior to version 2023.2, the client was located at the directory/opt/ . /opt/ is a hidden folder. To access it:
- Click the (+) icon to open Finder.
- Press Command+Shift+G.
- In the text field, enter
/opt - Open the /opt/ directory and you should see the “connectwisecontrol” client. Click on it to add it to the program list, and click on the checkbox to enable it.
And that is how to Install the ConnectWise ScreenConnect client on a Mac.
For support, please contact our Technicians at: (888) 737-2891
Mac Remote Support Using ConnectWise ScreenConnect
Using ConnectWise ScreenConnect for Mac support brings a host of benefits that cater specifically to the needs of modern IT professionals, technicians, and Mac users. This advanced remote access tool allows your computer technician to troubleshoot and resolve issues without the need for physical access, saving you time and reducing costs. Whether it’s tackling a stubborn software glitch or addressing hardware concerns, ScreenConnect ensures Mac users experience minimal downtime, all from the comfort of their home or office.
One standout feature is its ability to create a secure and seamless connection between the technician and your Mac. With high-quality, low-latency screen sharing, the support experience is smooth and uninterrupted, mimicking an in-person service level. Tools like file transfer, chat, and real-time annotation further enhance collaboration, making complex issues easier to understand and resolve. Plus, the platform supports multiple operating systems, meaning your technician can offer consistent, reliable support regardless of whether they’re working from a Mac, PC, or another device.
ScreenConnect also emphasizes security, offering session recording and two-factor authentication to protect sensitive data during remote sessions. This makes it especially appealing for industries like healthcare or finance, where confidentiality and data integrity are paramount. Whether you’re troubleshooting complicated Mac-specific issues, offering support to distributed teams using Macs, or hosting virtual training sessions, ConnectWise ScreenConnect delivers efficient, secure, and professional results every step of the way. With its ease of use and robust features, both technicians and customers benefit from a superior Mac remote support experience using ConnectWise ScreenConnect.


